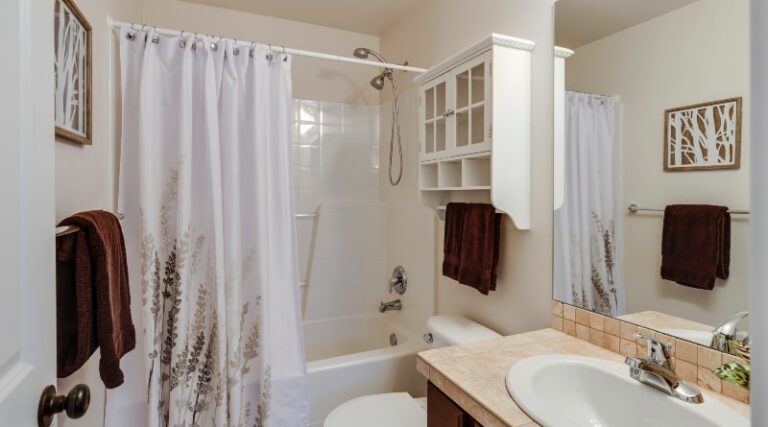
Select a fan with the appropriate CFM rating for your bathroom size and ventilation needs to ensure you properly install a bathroom fan to prevent mold and mildew.
A good rule of thumb is to have at least one CFM per square foot of the bathroom.
Once you have your fan, carefully locate the ideal installation spot and mark the cutting area to avoid electrical wiring or plumbing.
After that, cut the hole and install the fan housing, following all electrical and safety codes.
Connect the wiring to a nearby switch or electrical circuit, attach the fan cover, and test the fan to ensure it works correctly.
Why Ventilation is Crucial in Preventing Mold and Mildew Growth
A poorly ventilated bathroom can become a breeding ground for mold and mildew due to the accumulation of moisture from daily activities.
These fungi can cause respiratory problems, headaches, and allergies, among other health issues.
Proper ventilation is necessary to remove excess moisture from the bathroom, improving air quality and reducing the risk of mold and mildew growth.
A bathroom fan is a simple yet effective way to ensure proper ventilation.
It works by drawing in moist air and expelling it outside, creating a steady flow of fresh air into the bathroom.
A properly functioning fan can also reduce humidity levels in the bathroom, making it less hospitable to mold and mildew.
To maintain proper ventilation, keeping the bathroom fan on for at least 20-30 minutes after showering or bathing is essential.
This allows the fan to expel excess moisture and keep the bathroom dry.
Leaving the bathroom door open or cracking a window can also help promote proper ventilation and reduce moisture buildup.
Choosing the Right Bathroom Fan
Selecting the right bathroom fan ensures proper ventilation and prevents mold and mildew growth.
Here are some factors to consider when choosing a bathroom fan:
- CFM rating: CFM stands for cubic feet per minute, measuring how much air a fan can move per minute. A rule of thumb is to select a fan with a CFM rating of at least 1 CFM per square foot of the bathroom. For example, if your bathroom is 100 square feet, you’ll need a fan with a CFM rating of at least 100.
- Type of fan: There are different types of bathroom fans available in the market, including wall-mounted fans, ceiling-mounted fans, and inline fans. Wall-mounted fans are mounted on the wall and are ideal for small bathrooms. Ceiling-mounted fans are installed in the ceiling and can be ducted to the outside. Inline fans are installed in the attic or between the ceiling joists and are ideal for long duct runs.
- Noise level: Consider the noise level of the fan when selecting one. Fans with higher CFM ratings are noisier than those with lower ratings.
- Energy efficiency: Look for a fan with an Energy Star rating, which ensures it’s energy-efficient and will save you money on your utility bills.
- Style: Bathroom fans come in different styles and designs, so choose one that matches the decor of your bathroom.
Once you’ve selected a fan, follow the manufacturer’s instructions for installation and use.
Determining the Installation Location
Choosing the right location for your bathroom fan is crucial for adequate ventilation.
Here are some tips for determining the best location:
- Install the fan directly over the shower or bathtub: This is ideal because it will remove moisture and steam from the air as soon as it’s produced.
- Keep the fan at least three feet away from any showerhead or faucet: This will help prevent water from splashing onto the fan and causing damage.
- Choose a location with enough clearance above the ceiling: You’ll need to cut a hole in the ceiling to install the fan, so ensure there’s enough space between the ceiling joists to accommodate the fan housing.
- Avoid electrical wires and plumbing pipes: Before cutting the hole in the ceiling, ensure no electrical wires or plumbing pipes are in the way. You’ll need to reposition the fan to avoid them if there are.
- Consider the ductwork: The fan will need to be ducted to the outside, so make sure there’s enough space in the ceiling or wall for the ductwork.
Once you’ve determined the best location for your fan, use a stud finder to locate the ceiling joists and mark the location for the fan housing.
Take accurate measurements and use a level to ensure the fan housing is installed straight.
Cutting the Hole and Installing the Fan Housing
Once you’ve determined the ideal location for your bathroom fan, it’s time to cut the hole and install the fan housing.
Follow these steps:
- Turn off the power: Before starting any electrical work, turn off the power to the bathroom circuit at the breaker box.
- Mark the hole: Use the template provided with the fan to mark the hole on the ceiling or wall. Use a pencil and a level to ensure that the hole is straight.
- Cut the hole: Use a jigsaw to cut the hole along the marked lines. Wear protective eyewear and a dust mask to prevent debris from entering your eyes or lungs.
- Install the fan housing: Fill it into the hole and secure it to the ceiling joists using the included screws. Make sure the housing is level and flush with the ceiling.
- Connect the ductwork: Attach the ductwork to the housing using duct tape or screws. Ensure the duct is long enough to reach the outside of your home.
- Seal the edges: Use caulk or foam insulation to seal the housing edges to prevent air leaks.
Once the fan housing is installed, you can connect the wiring.
Connecting the Wiring
After installing the fan housing, it’s time to connect the wiring. Follow these steps:
- Identify the wires: Look for the black (hot), white (neutral), and green or bare (ground) wires in the fan housing.
- Connect the wires: Use wire nuts or twist the wires together and secure them with electrical tape. Connect the black wire from the fan to the black wire from your electrical box, the white wire from the fan to the white wire from your electrical box, and the green or bare wire from the fan to the green or bare wire from your electrical box.
- Connect to a switch or electrical circuit: To operate your fan, you’ll need to connect it to a switch or electrical circuit. Follow the manufacturer’s instructions for wiring the fan to the switch or circuit.
- Secure the wires: Use wire connectors or electrical tape to secure the wires and prevent them from coming loose.
It’s essential to ensure all wiring is done correctly to prevent electrical hazards or malfunctions.
If you’re uncomfortable with electrical work, consider hiring a licensed electrician to install your bathroom fan.
Once the wiring is complete, you can attach the fan cover and test the fan.
Attaching the Fan Cover and Testing the Fan
Attaching the fan cover and testing the fan are the final steps in the installation process.
Follow these steps to complete your bathroom fan installation:
- Attach the fan cover: Secure the fan cover to the housing using the manufacturer’s instructions. Ensure the cover is securely placed and flush with the ceiling or wall.
- Test the fan: Turn on the switch or electrical circuit to test the fan. Listen for any unusual noises or vibrations which could indicate a problem. Ensure the fan is drawing air out of the bathroom and venting it outside.
- Check the airflow: Hold a piece of toilet paper up to the fan to check the airflow. The paper should be drawn towards the fan and held in place. If it falls, the fan may not be powerful enough for your bathroom.
- Make any necessary adjustments: If the fan isn’t working correctly, make any necessary adjustments or consult the manufacturer’s instructions.
- Finish the installation: Cover gaps around the fan housing with caulking once you’re satisfied with the fan’s performance.
Remember to keep up with regular maintenance to keep your fan functioning correctly for years.
Additional Ventilation Methods
While a bathroom fan is an essential part of proper bathroom ventilation, there are other methods you can use to improve air quality and reduce moisture in your bathroom.
Here are some additional ventilation methods to consider:
- Open windows: Opening windows can help improve airflow and reduce moisture in your bathroom. However, there may be more practical solutions in colder climates or during the winter months.
- Use a dehumidifier: Dehumidifiers can help reduce humidity levels in your bathroom, preventing mold and mildew growth. They work by extracting and collecting moisture from the air in a tank.
- Add vents: Adding vents to your bathroom can help improve airflow and reduce moisture levels. You can install vents in the ceiling or walls or use window fans to create cross-ventilation.
Remember, while these additional ventilation methods can be helpful, they should not be used as a replacement for a bathroom fan.
A fan is still the most effective way to remove moisture from your bathroom and prevent mold and mildew growth.
Maintenance
Regular maintenance ensures your bathroom fan functions correctly and lasts for years.
Here are some tips for maintaining your fan:
- Clean the blades and housing: Dust and debris can accumulate on the blades and housing, reducing the fan’s efficiency. Clean the blades and housing with a soft cloth or vacuum attachment.
- Change the filter: If your fan has a filter, replace it every six months or according to the manufacturer’s instructions.
- Check the wiring: Check the wiring periodically to ensure it’s secure and not damaged. Consult a professional electrician if you notice any frayed wires or loose connections.
- Lubricate the motor: If your fan has a motor, lubricate it according to the manufacturer’s instructions.
Conclusion
Preventing mold and mildew growth in your bathroom is essential for maintaining a healthy home.
Installing a bathroom fan is critical in ensuring proper ventilation and reducing moisture buildup.
Following the steps outlined in this guide, you can select and install the right bathroom fan for your needs, determine the ideal installation location, and ensure proper wiring and testing.
Also, you can employ other ventilation methods such as opening windows, using dehumidifiers and adding vents to improve air quality in your bathroom.
Eventually, regular maintenance is essential to keep your fan functioning correctly for years.
Cleaning the blades and housing, changing the filter, and checking the wiring are all necessary steps to ensure your fan continues to prevent mold and mildew growth.
You can enjoy a clean, healthy bathroom environment with proper ventilation and regular maintenance.
FAQs
A. Ventilate your bathroom by using a fan, opening windows, or adding vents to improve air circulation.
A. Vent your bathroom fan through the roof or an exterior wall to expel humid air outside.
A. Use a dehumidifier, wipe down surfaces after showering, or keep the bathroom door open to allow moisture to escape.
A. An exhaust fan can help reduce moisture levels in the bathroom, preventing mold growth.
A. A fan can help prevent mold in your bathroom by removing moisture from the air.